Documentation
Introduction to Planfeld
Planfeld Major Functions
Planning Session
Monitoring a Campaign
Configure the New Plan
Step 1: Input the name of the plan, proposed duration for this session being planned or the number of teams that will be working to implement the plan during this session in their respective fields.
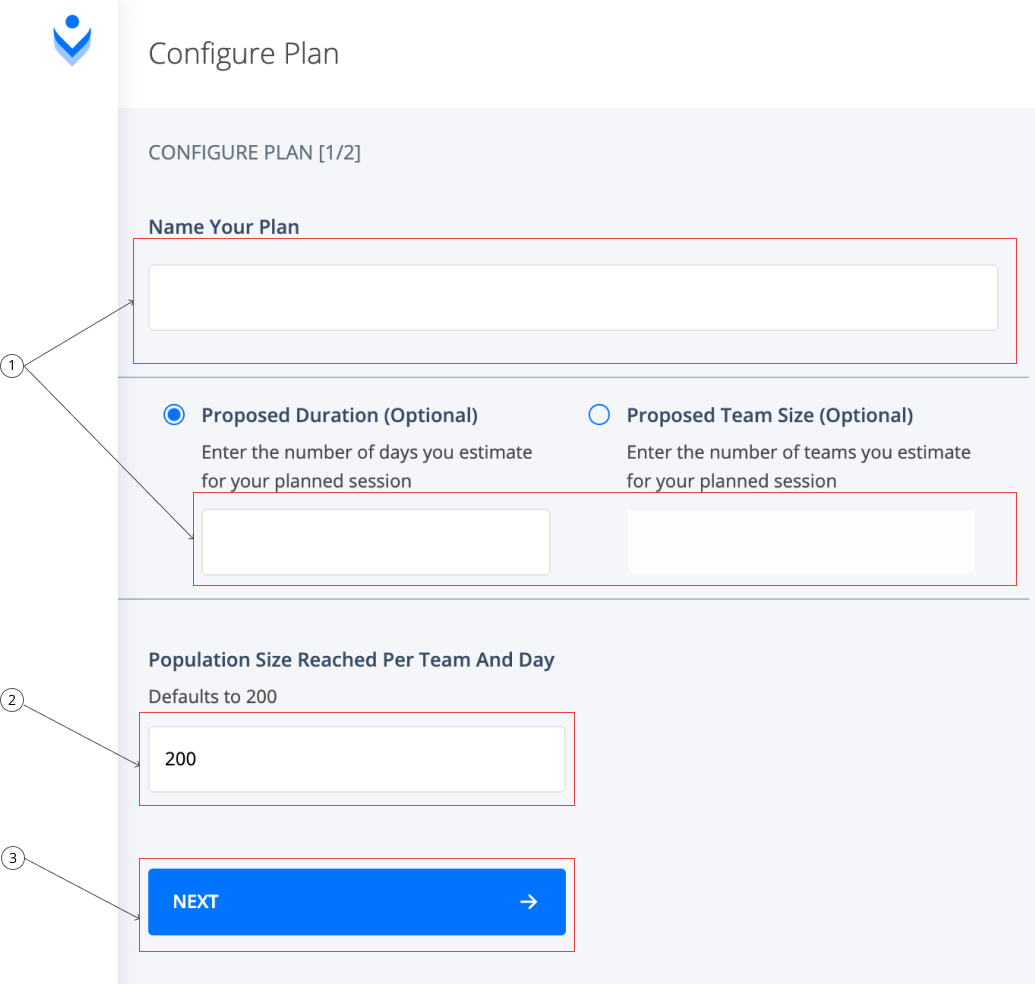
Step 2: Enter the estimated population size that can be reached per team by day.
Note:
Select “Upload Custom Data” if you have an existing microplan in csv format you intend to use as base data.
Step 3: Select “Next” to continue.
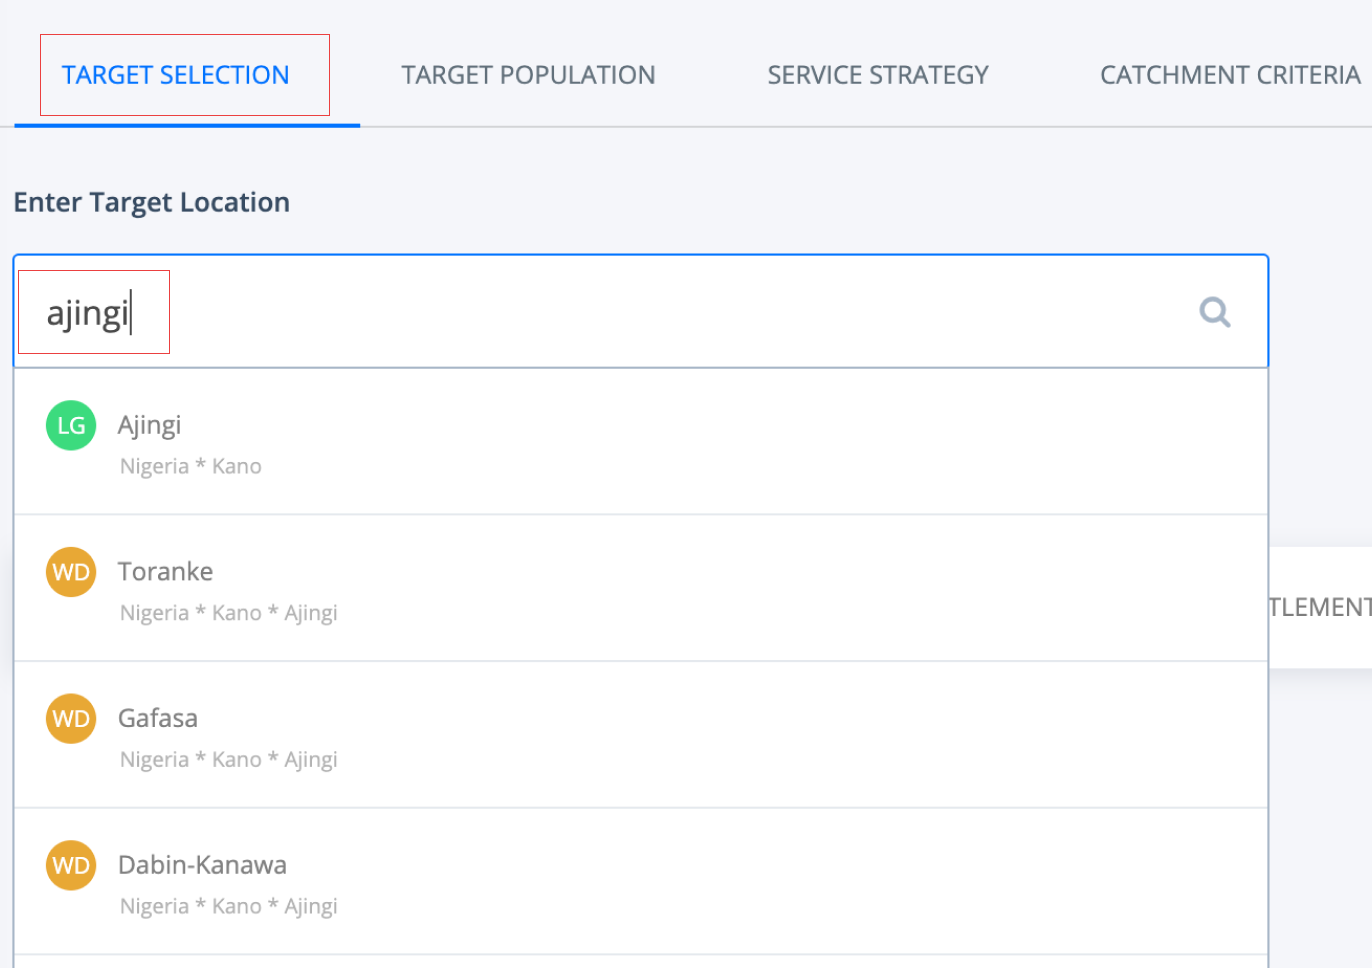
Step 4: Under the “TARGET SELECTION” page menu, start typing the name of your target location in the input field provided.
Note:
- As you begin to type into the target location input field, a drop down appears containing a list of all locations similar to the name being typed.
- The tool helps you differentiate locations with similar names by using tags of their respective administrative level as shown here.

Step 5: Select the target location from the drop down
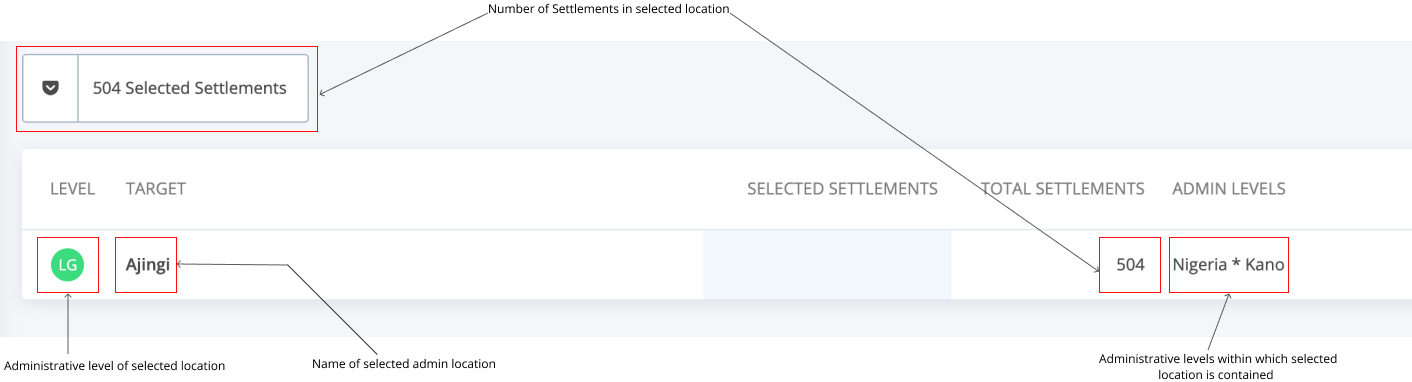
Result: The tool displays additional information on the selected location as shown
Note:
- You can either cancel & exit this session planning or save to return to it later from this point going forward. Simply click on the applicable tab at the top right corner of your session planning pages
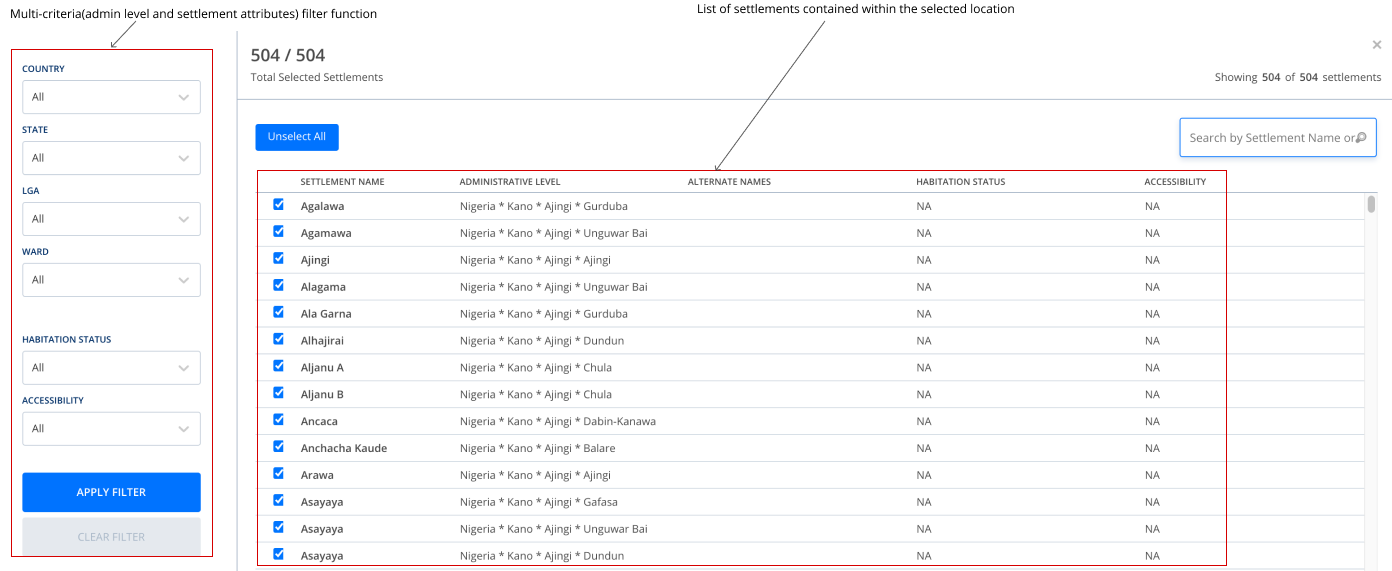
- You can also review the list of settlements contained in the selected location by selecting “Review Settlements” to see the list of settlements on the pop-up window as below.
Step 6: Under the “TARGET POPULATION” page menu, select “Add Demography” to indicate the target age group and gender you are planning for.
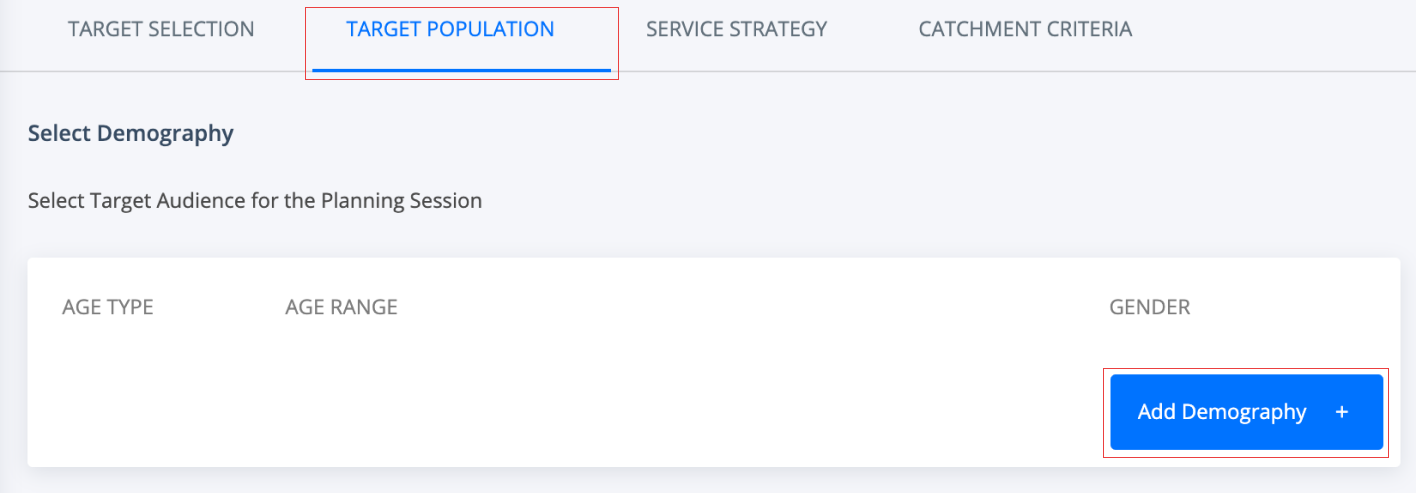
Step 7: Select age type (i.e. year or months) and the age range using the slider.

Note: You can enter multiple target demographics by simply clicking on “Add Demography” again.
Step 8: Proceed to “SERVICE STRATEGY” page menu to define the service strategy that would be used for your session.
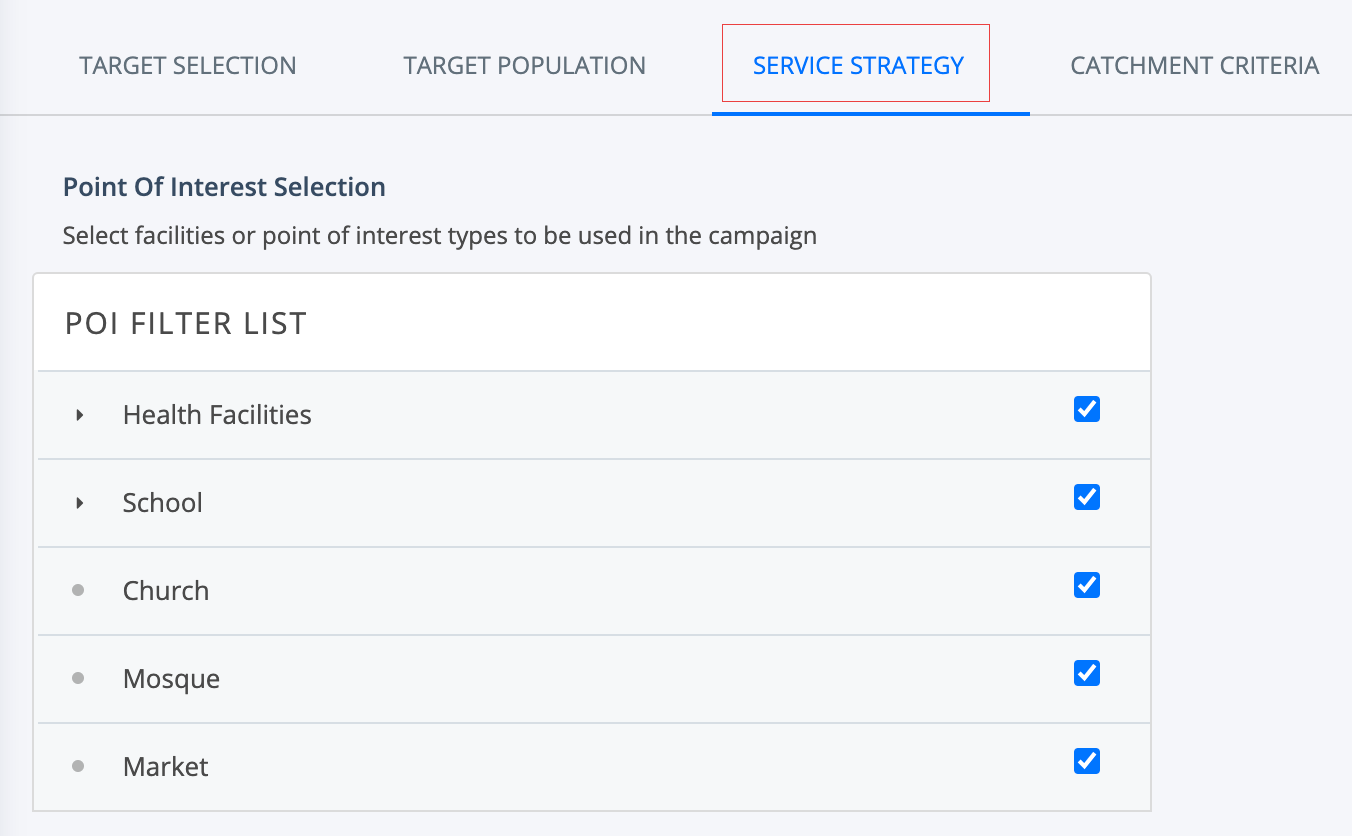
Step 9: Select facilities or points of interest that will be used for the RI campaign being planned.
Note:
- Watch out for PoIs with the arrow-tip bullet as it signifies that the PoI has sub-categories.
- You can also reprioritize the ranking of the PoIs as reference points i.e if you want Mosque to be considered first, simply click on Mosque and drag to the top of the PoI list.
Step 10: Select applicable service strategies and use the corresponding slider under each to define the range of each service strategy (i.e fixed post, mobile and outreach).
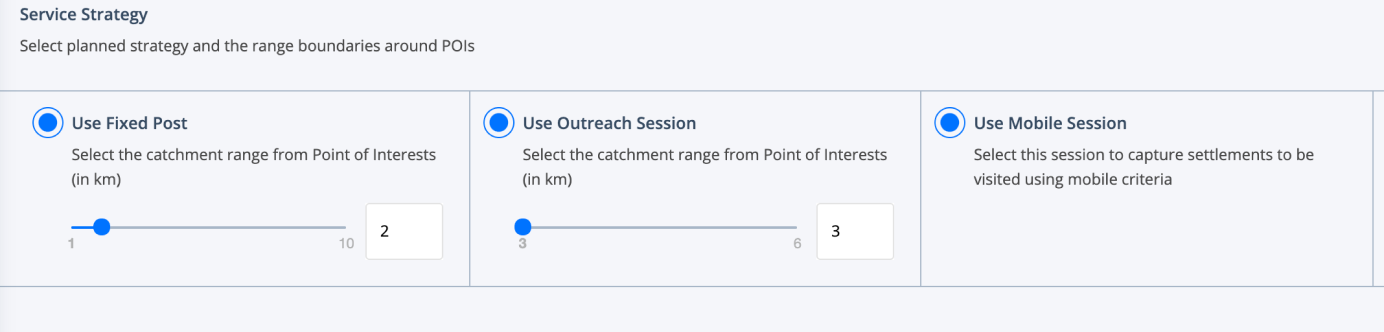
Note: You can review your definition of your selected service strategy on a map by selecting the tab “Review on Map”, otherwise, you can “Reset to Default”.
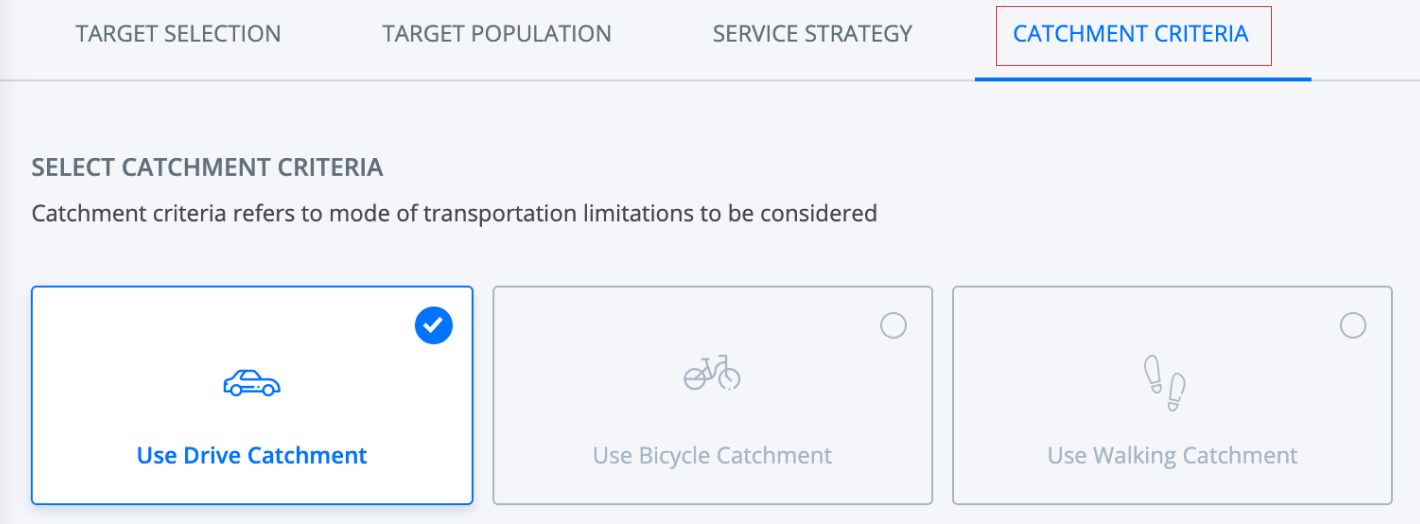
Step 11: Next, select the “CATCHMENT CRITERIA” page menu to indicate the transportation limitations (i.e. driving a vehicle, riding a bicycle or walking on their feet) for the teams that will be conducting the session activities.
Step 12: Finally, select the “SAVE” tab at the top right corner of the configuration page after supplying all needed parameters to commence generation of plan.
Result:
- The tool generates a session plan based on the configuration parameters provided and then displays a screen with target location, population, service strategy and catchment criteria when this is completed.
- This plan can be downloaded as either a CSV or GeoJSON file.